Frequently Asked Questions
- Ensure you're logged in (sign up here, if you don't have an account)
- Navigate to the road you want to add an update for. For example: Mamquam FSR
- Click the Add Bulletin link near the bottom of the page
- Add the date you drove the road
- Add a description of the conditions you found
- You can optionally select up to 8 images to add.
- Click Add Bulletin
- You should now see your bulletin on the road page!
- Click on the Road Condition drop-down
- There are five ratings to choose from: Good, Degraded, Heavily Degraded, Impassable and Unknown
- Select the one that best represents the condition of the road you drove
- Drag the slider up to the point where you drove or where the road rating changes
- If you feel the condition of the road changes, you can mark that change by making another selection from the dropdown and dragging the new road rating to the appropriate place
How do I delete a condition on a road?
Double-click on any of the slider handles to remove a condition as in the video below:
What if I didn't drive the first part of a road?
You have likely noticed that when you select a condition from the dropdown, it starts from the beginning of the road. If there's a section of road you didn't drive, such as the beginning, you can simply select "Unknown" from the dropdown and move the slider up to the point where you did start driving. From there, add your conditions as normal. You can mix and match unknown with other road conditions if there is more than one section that you did not drive.
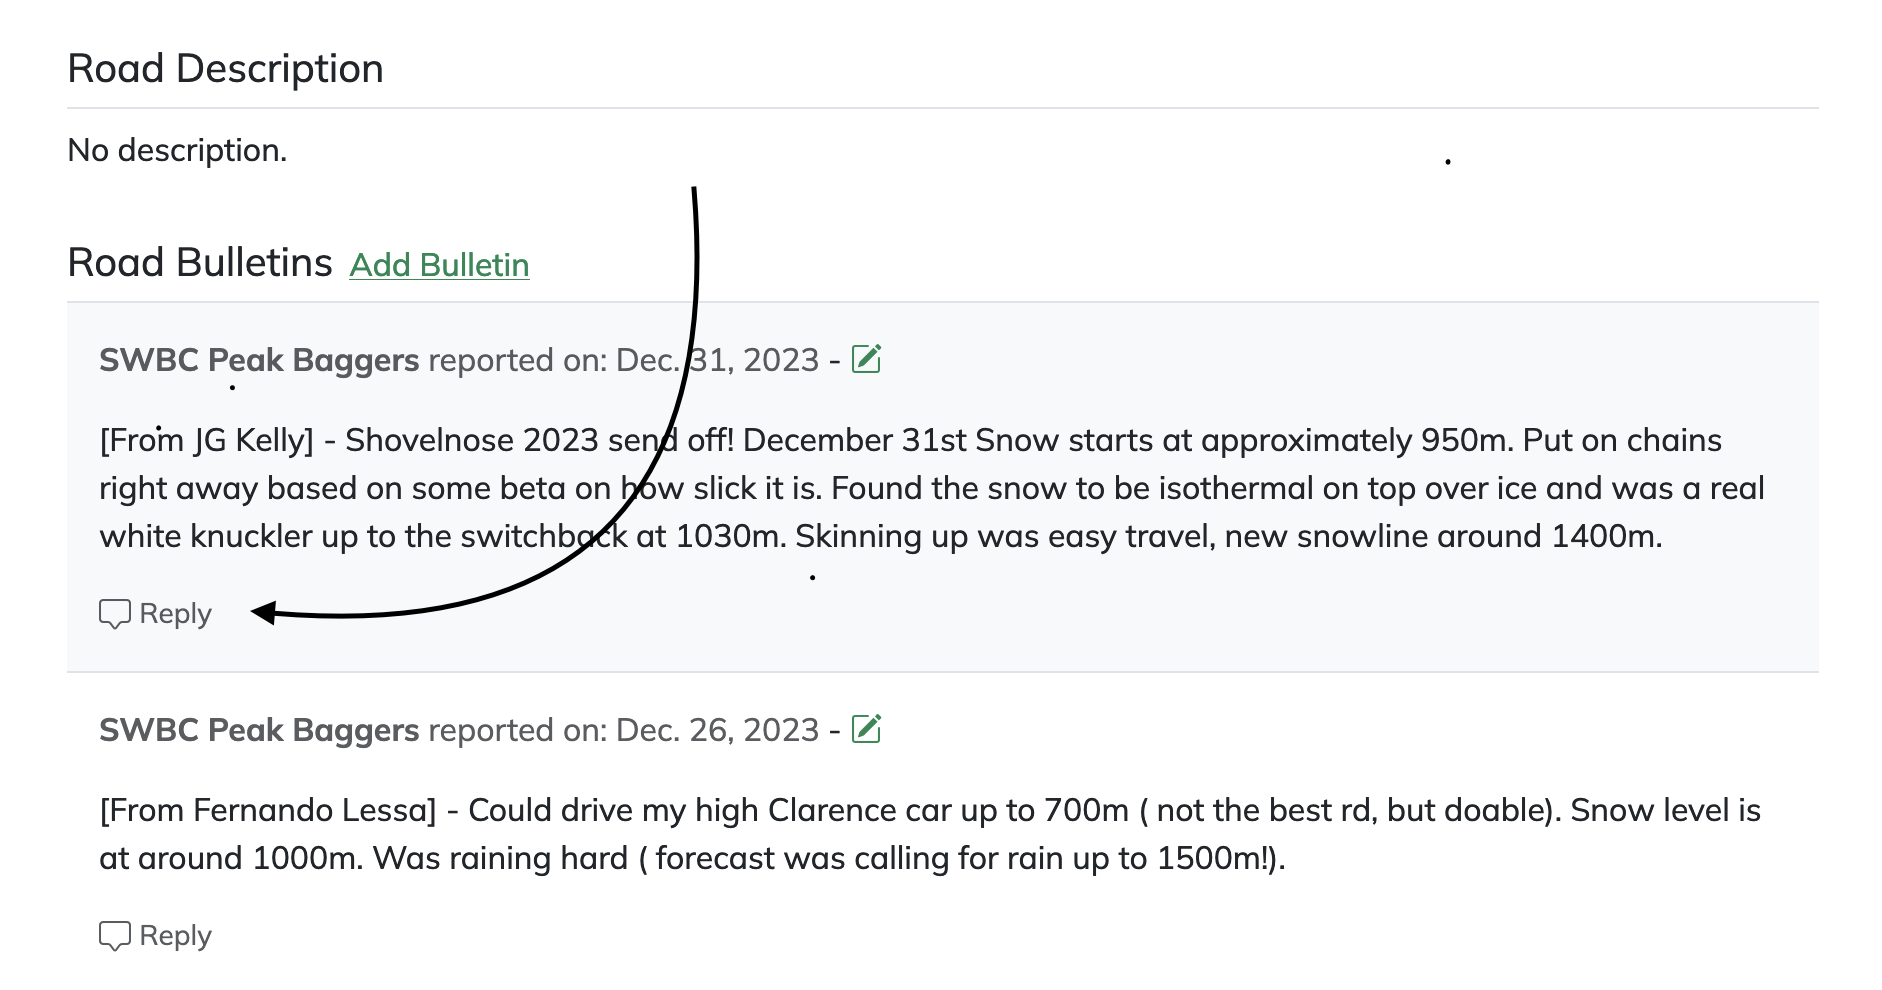
- Ensure you're logged in (sign up here, if you don't have an account)
- Navigate to the road with the bulletin you wish to reply to. For example: Shovelnose Creek FSR
- Click the Reply button: Reply
- Add your comment and save!
Registered users can now navigate to a road page and click the: Watch button to watch for road updates.
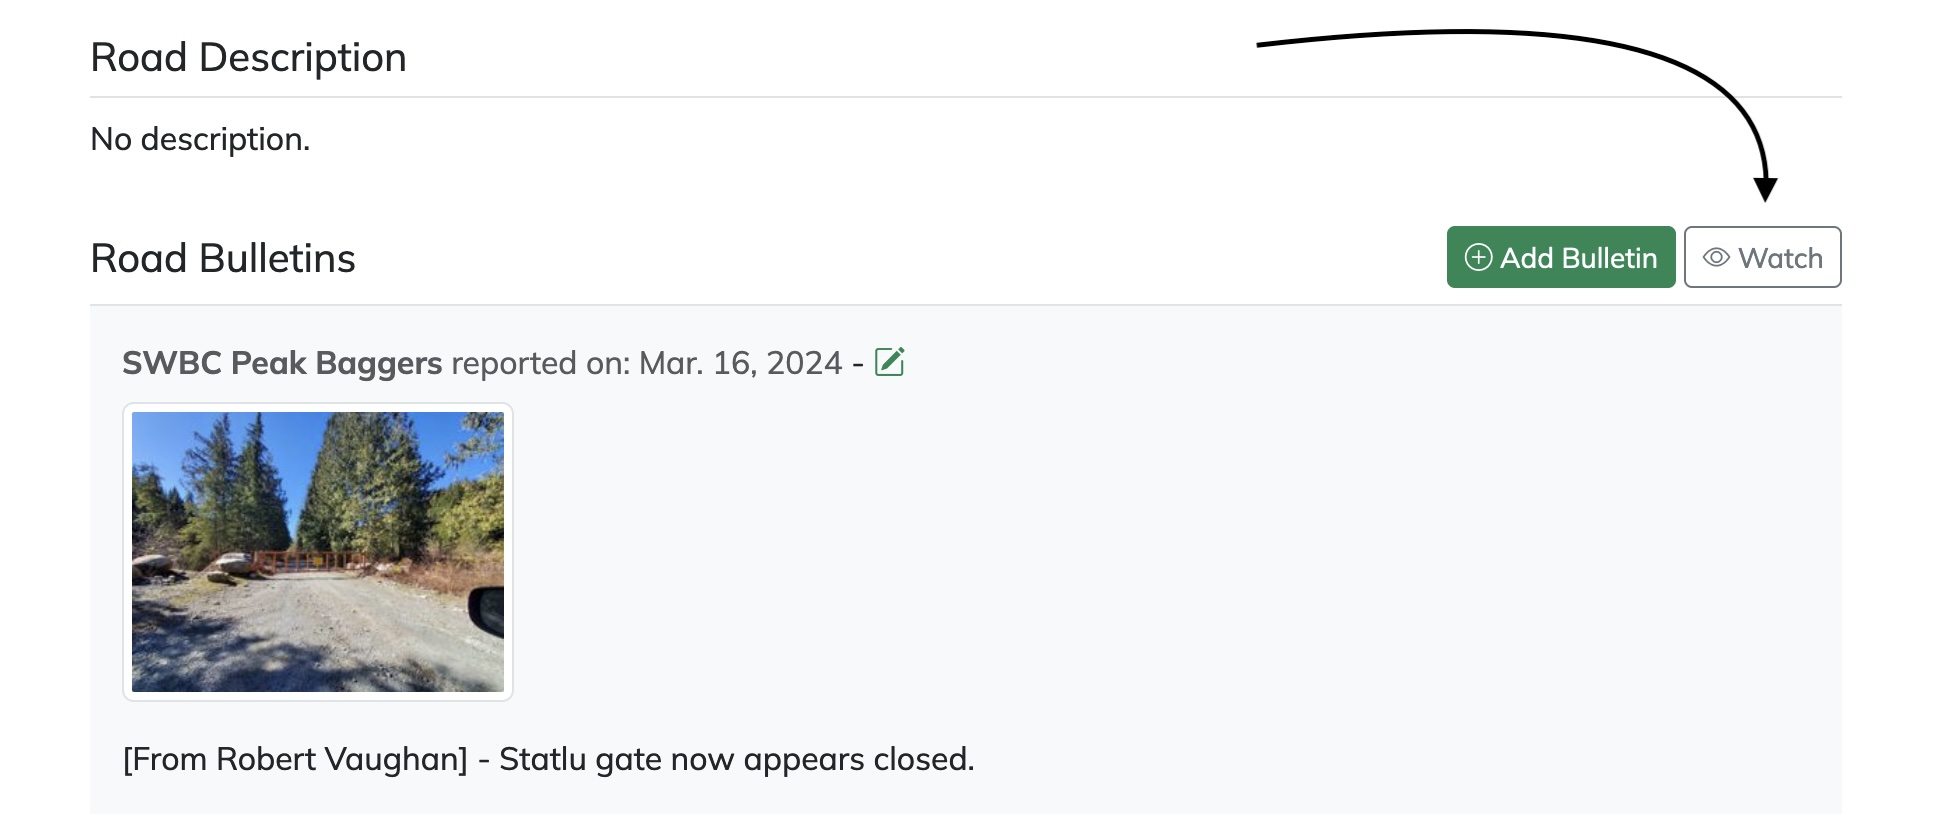
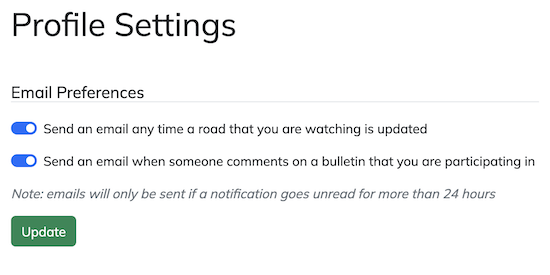
Any time a road bulletin is posted to that road page, you will be notified of the update. If you have email notifications turned on, those updates will be sent to your email address after 24 hours.
If you would like to unsubscribe simply click the Unwatch button from the road page that you are watching.
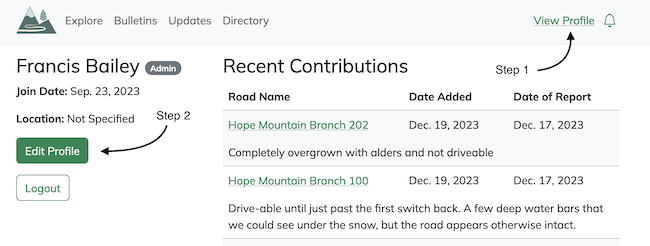
Simply login, click on the "View Profile" button at the top of the page and then the "Edit Profile" button below your name.
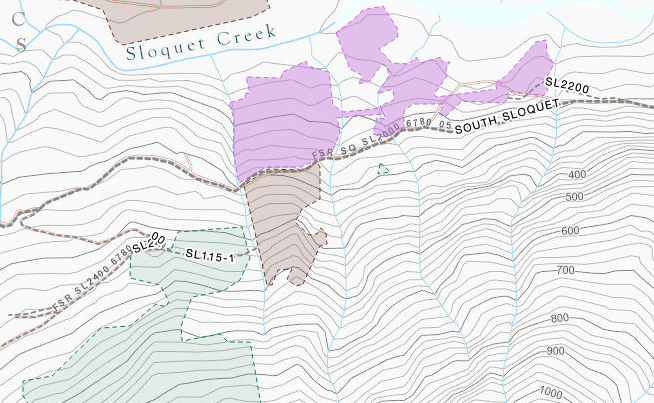
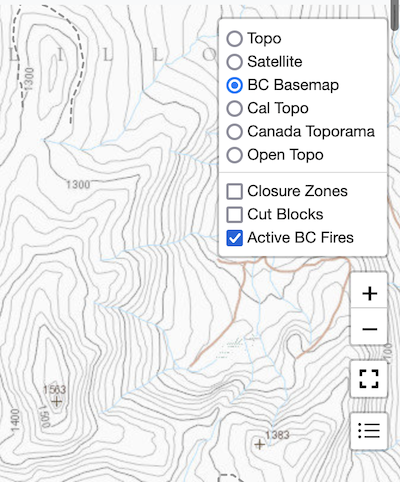
A cut block is an area of forest that is going to be logged, has been logged or is actively being logged. Cut blocks offer useful clues about the state of roads around them as active or pending cut blocks indicate that the road conditions are in good shape to support logging operations. Click on any cut block on the map to view more information about which phase of logging it's in and when it last saw activity.
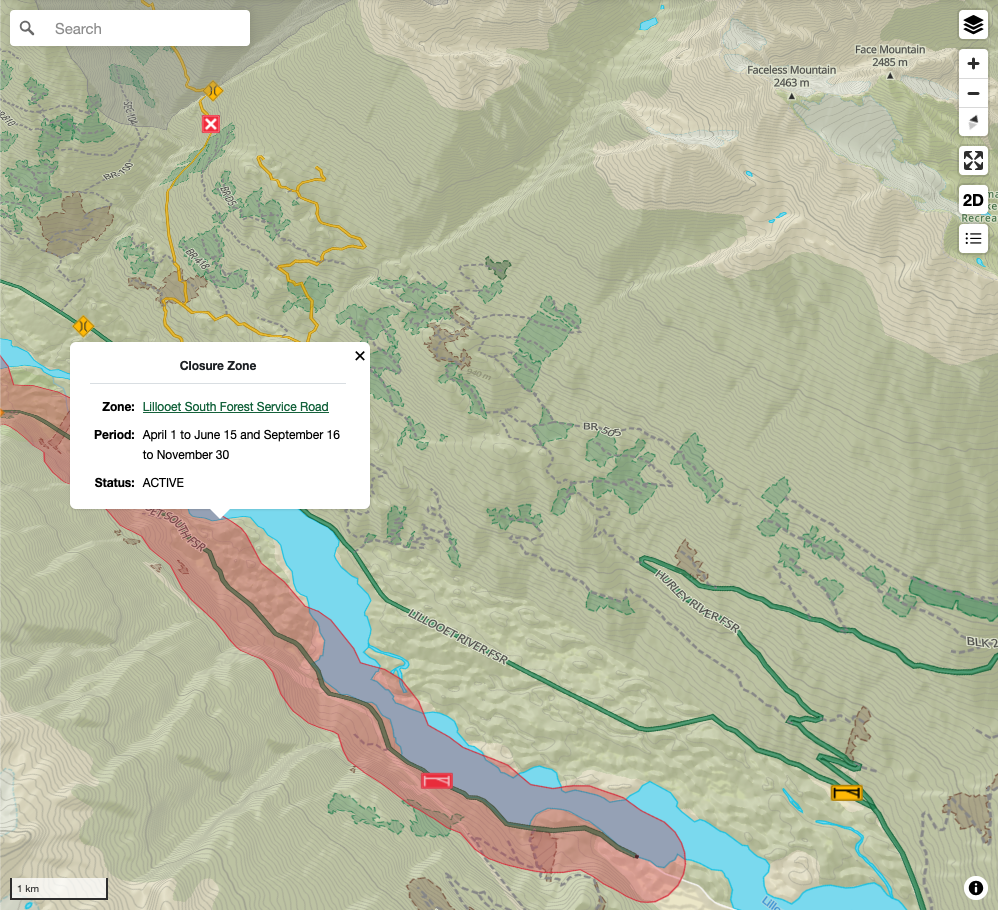
Closure zones are areas of land that prohibit vehicle travel for fixed periods of time. Often mandated by law through the Wildlife Act and more recently the Land Management Resource Plan. Backroadstatus.com automatically monitors these closure zones and posts notices when roads are affected by closures. You can view detailed information about each of these zones prior to heading out on the road and download them for offline use. Check out the Lillooet South FSR Closure Zone as an example.
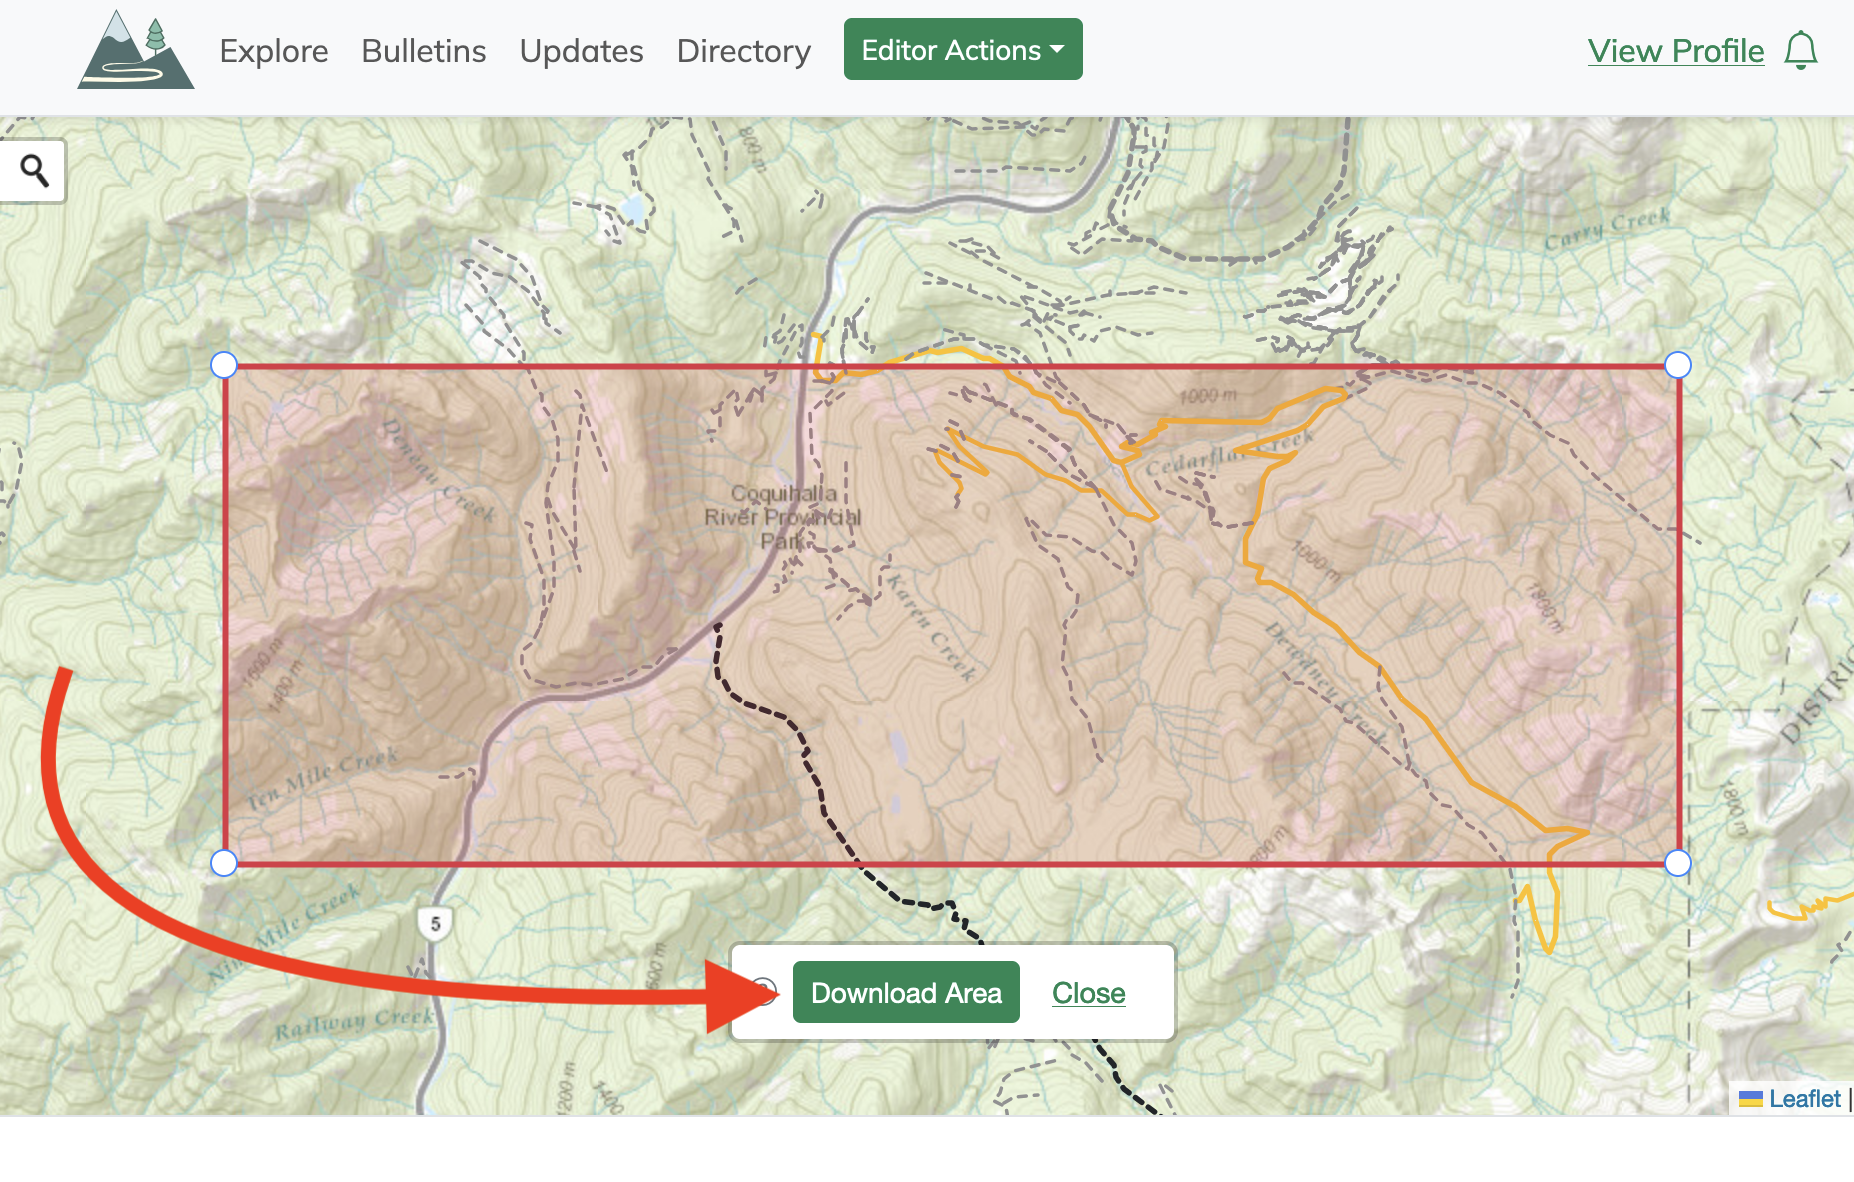
Backroadstatus.com now supports offline maps that can be loaded into your favourite mapping application to take on the road with you. The maps are regenerated once a day to ensure the latest road condition updates are made available.
For instructions on how to add these maps for your app of choice, see below:
 Gaia
Gaia
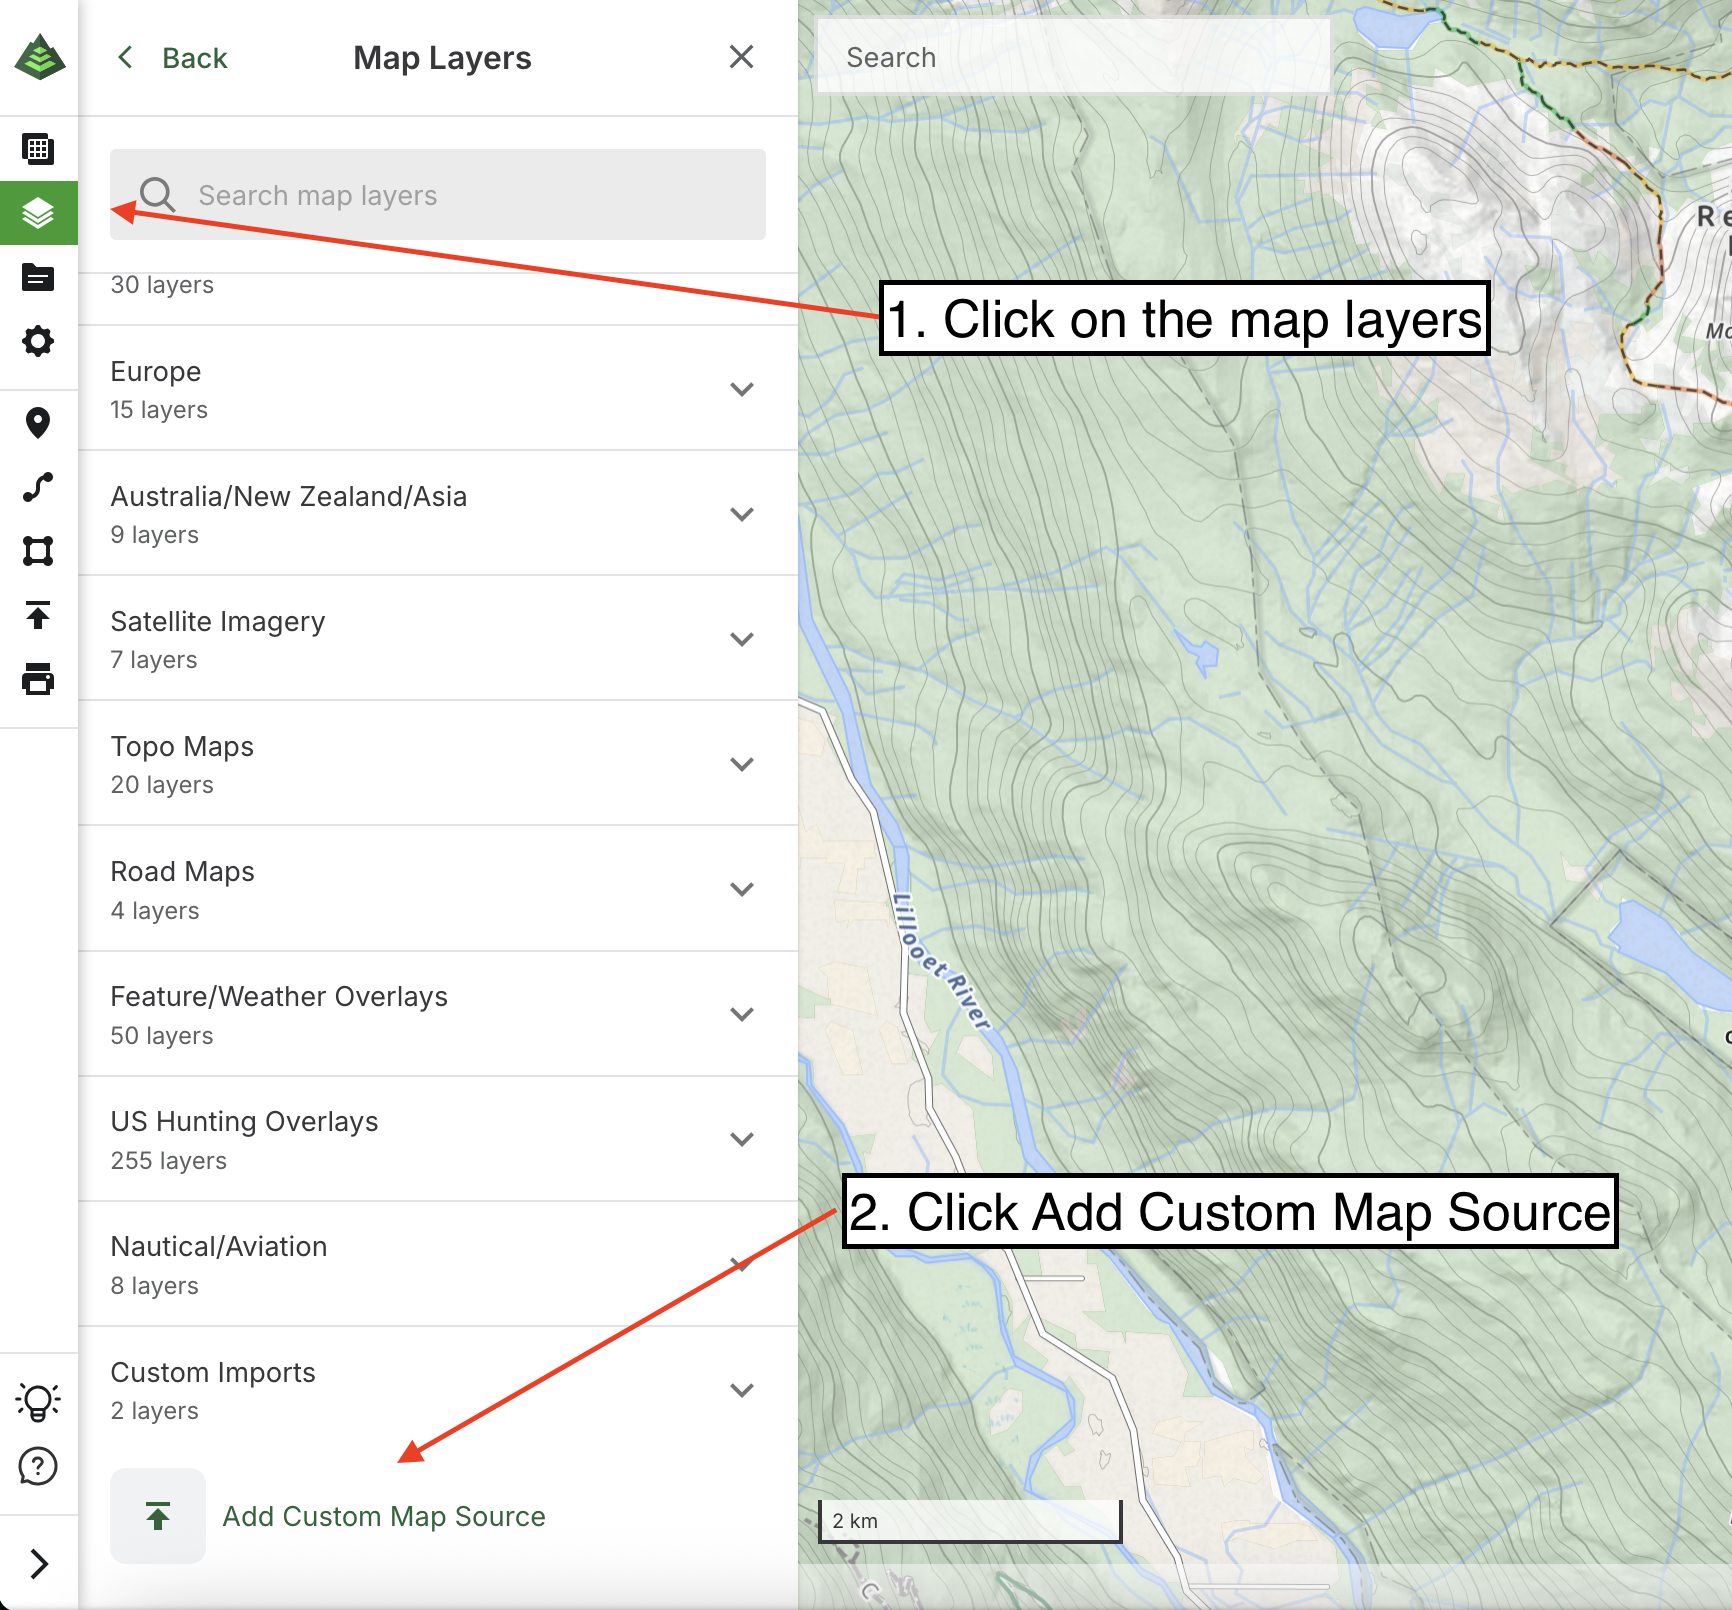
Adding custom map layers can only be done from the website, but your new layers will be available on your mobile app afterwards.
Steps
- Navigate to Gaia Gps
- Click the: Layers button
- Click the: Add Map Layers button at the bottom of the side panel
- Click the: Add Custom Map Source button at the bottom of the side panel
- Use the following settings:
- Title/Name: BRS - Mobile
- Title URL: https://tiles.backroadstatus.com/styles/backroadstatus/512/{z}/{x}/{y}@2x.png
- Zoom Range: 8 to 14
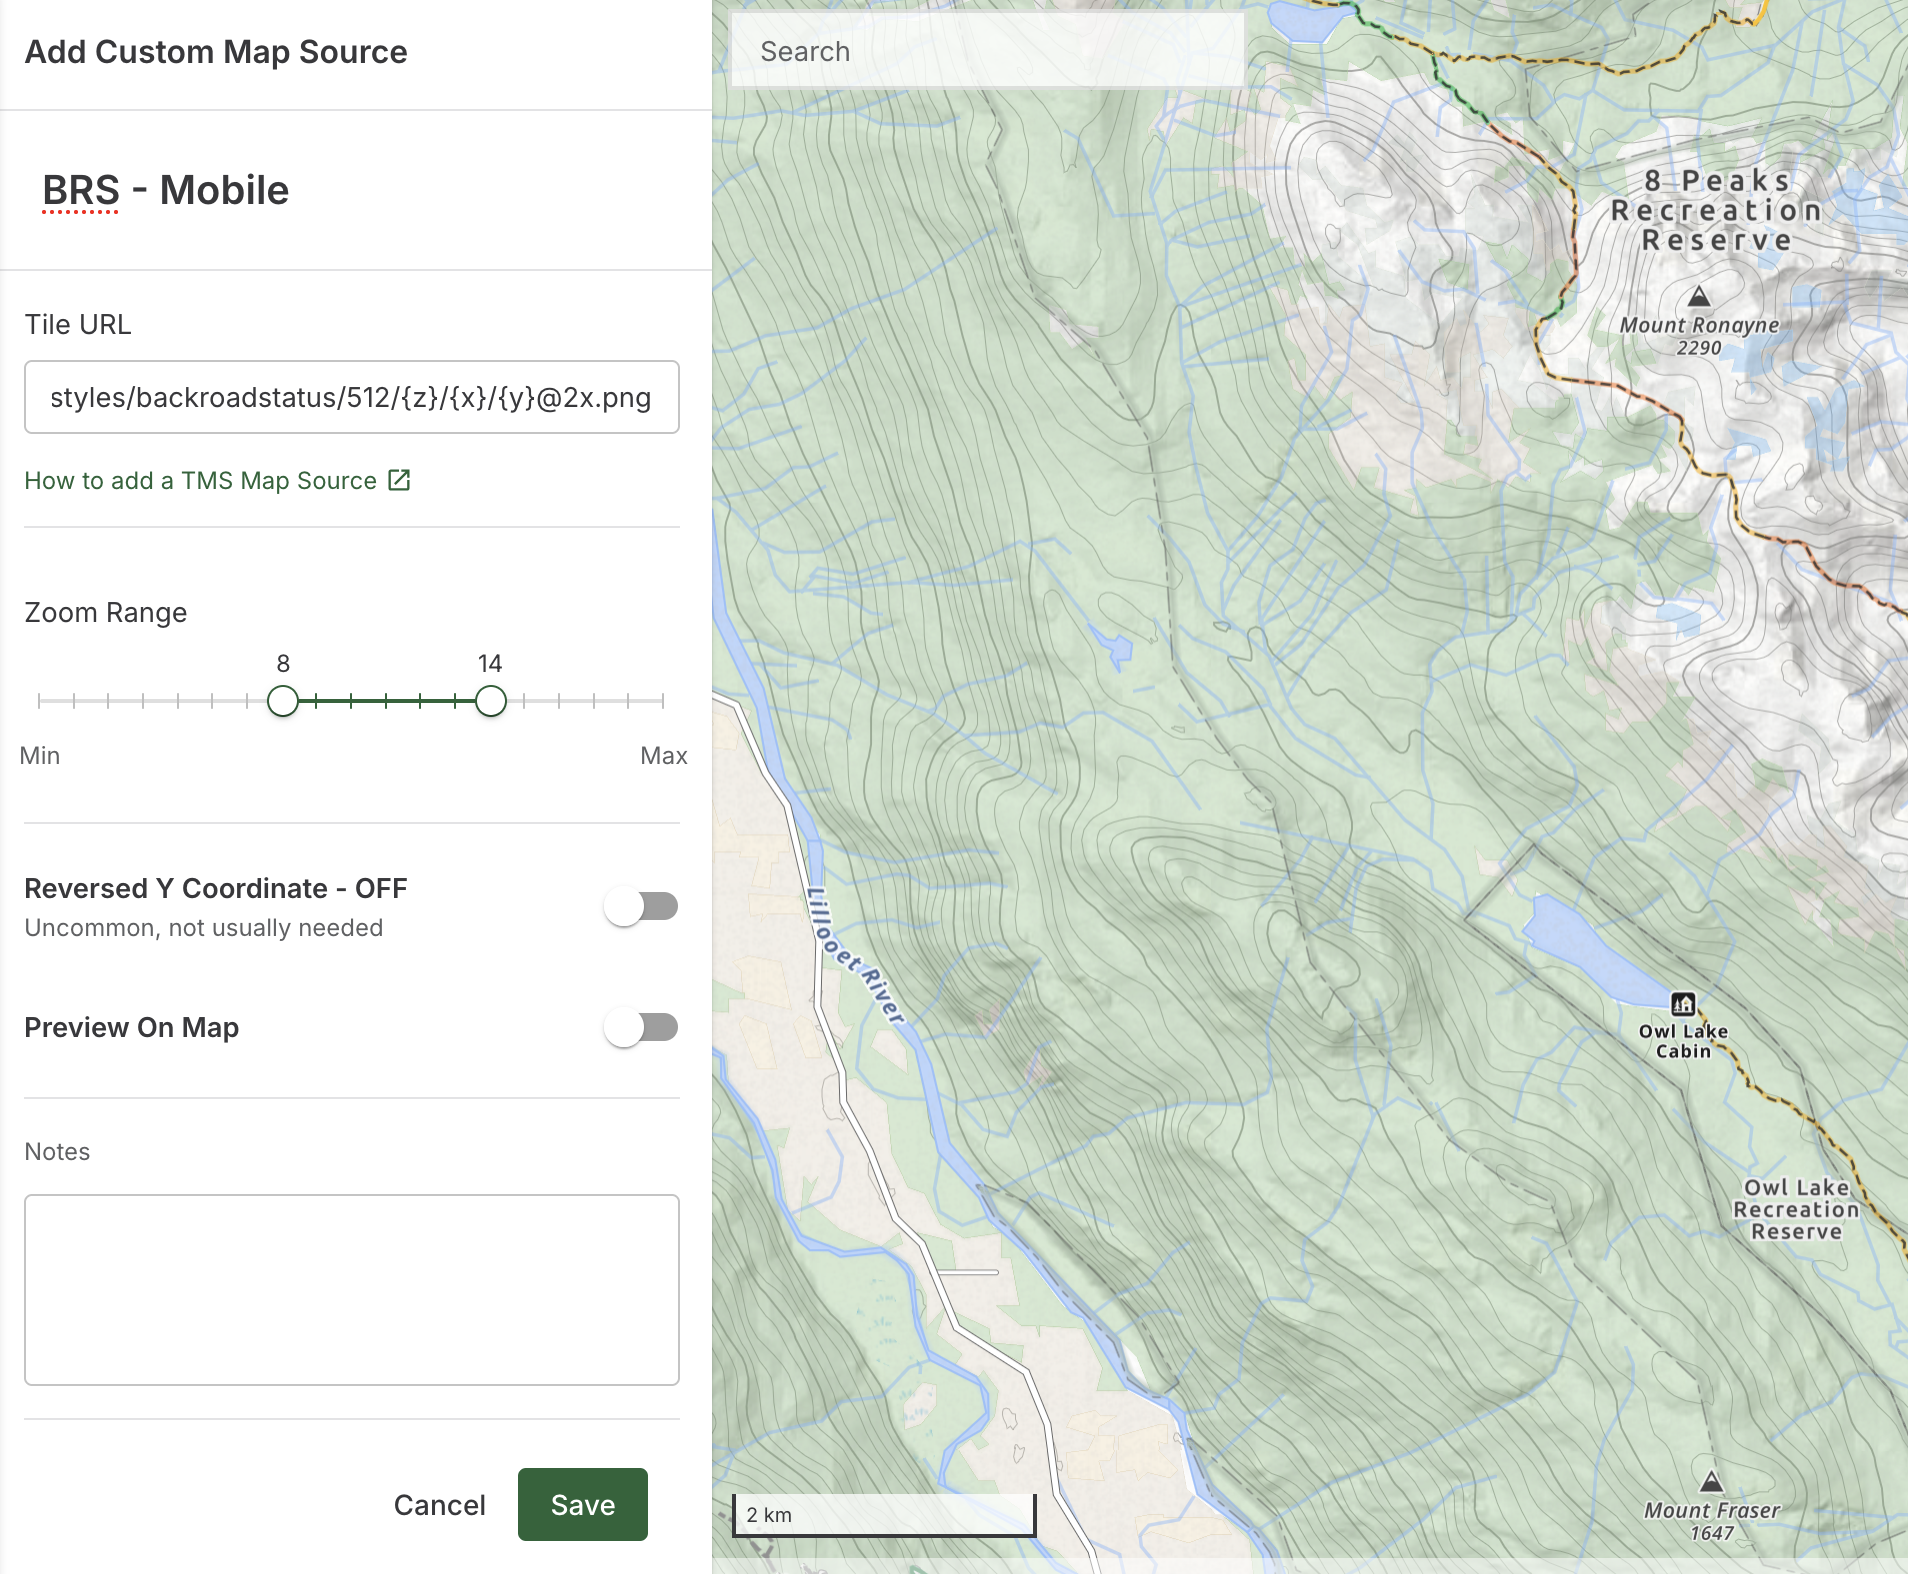
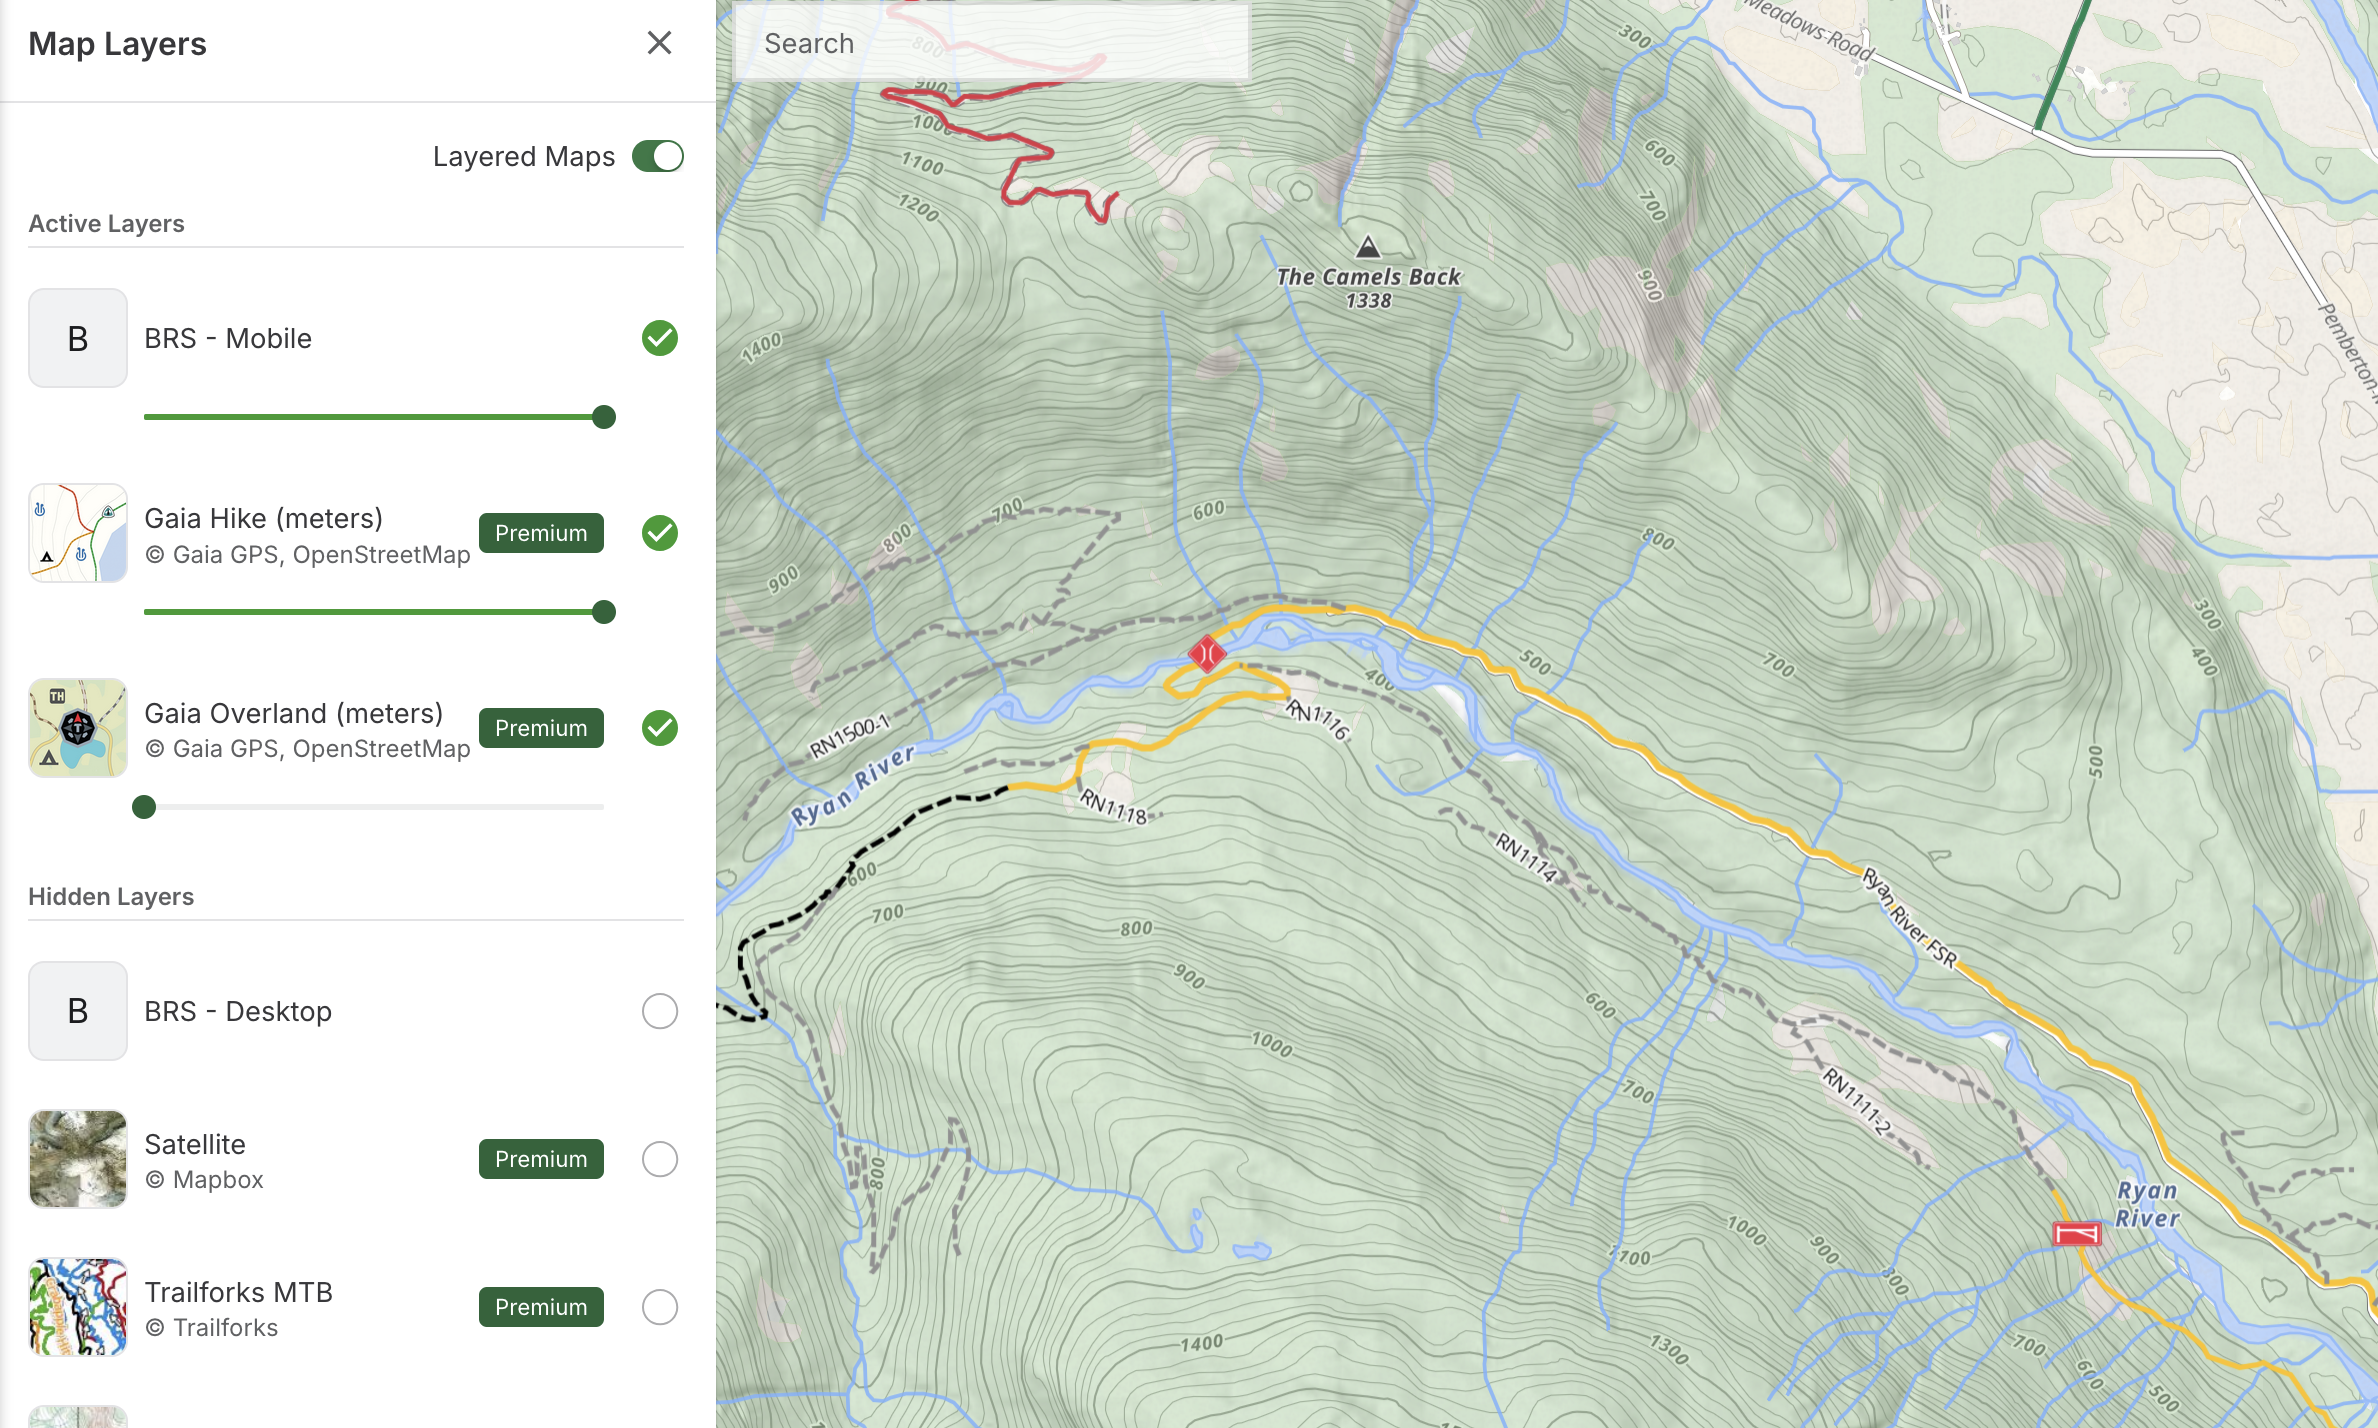
Note that this layer is optimized for mobile devices. If you wish to have a better viewing experience on desktop you can create a second layer with the following settings:
- Title/Name: BRS - Desktop
- Title URL: https://tiles.backroadstatus.com/styles/backroadstatus-desktop/512/{z}/{x}/{y}@2x.png
- Zoom Range: 8 to 14
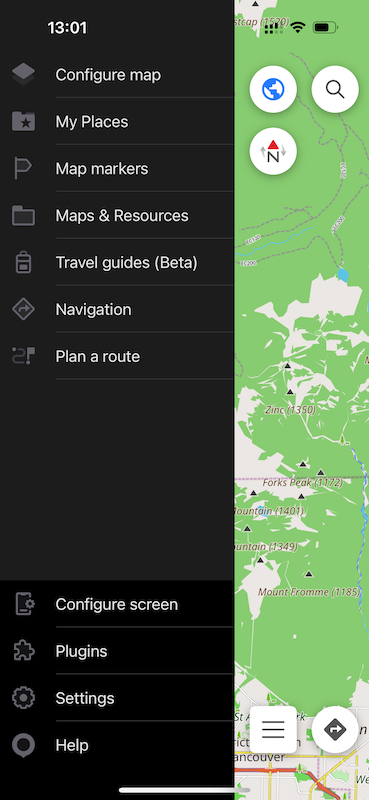
 OSMAnd
Steps
- Open your OSMAnd App
- Click the: Menu button
- Click the: Configure Map
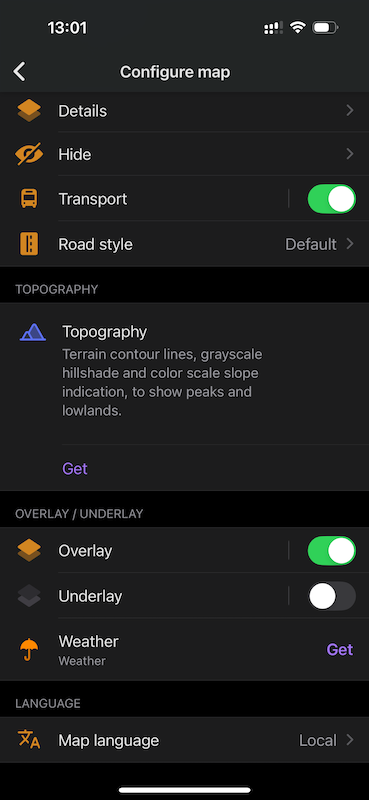
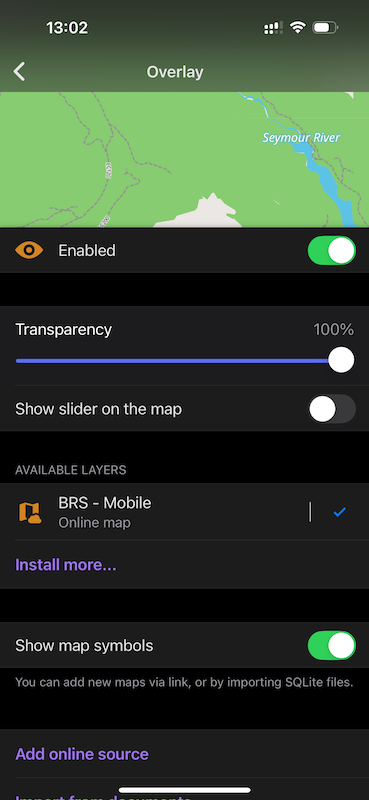
- Click the: Overlay button near the bottom
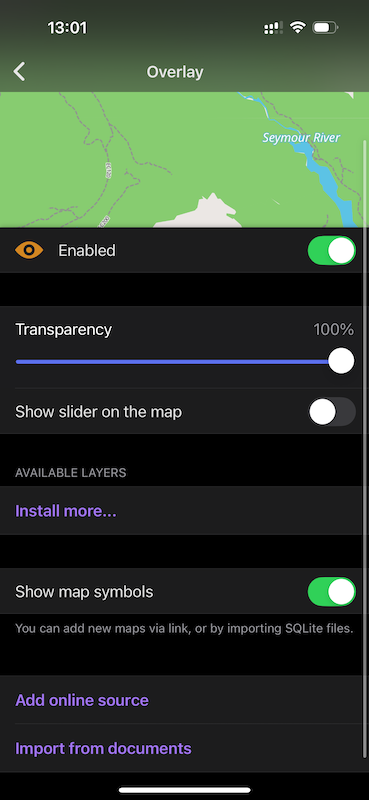
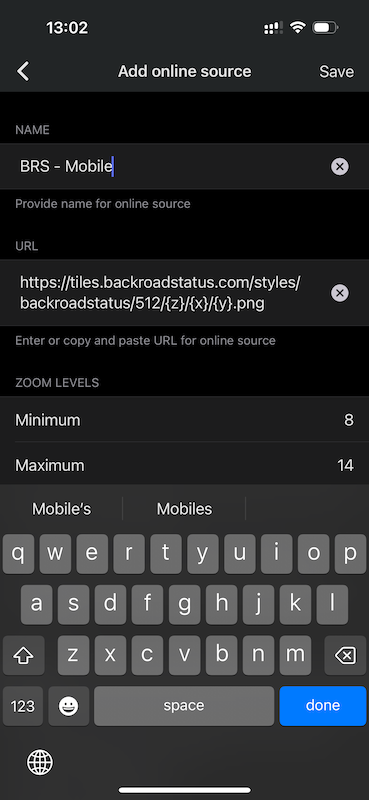
- Click the: Add online source button
- Use the following settings:
- Name: BRS - Mobile
- URL: https://tiles.backroadstatus.com/styles/backroadstatus/512/{z}/{x}/{y}.png
- Zoom Levels - Minimum: 8
- Zoom Levels - Maximum: 14
- Expire time: 1440
- Click the: Save button
- Now under the Available Layers section you should see your new layer
- Ensure that the Enabled switch is on and transparency is 100%
Other Apps
For apps not listed, choose the custom layer options provided and ensure that you used the following settings
- Name: BRS - Mobile
- URL: https://tiles.backroadstatus.com/styles/backroadstatus/512/{z}/{x}/{y}.png
- Zoom Levels - Minimum: 8
- Zoom Levels - Maximum: 14

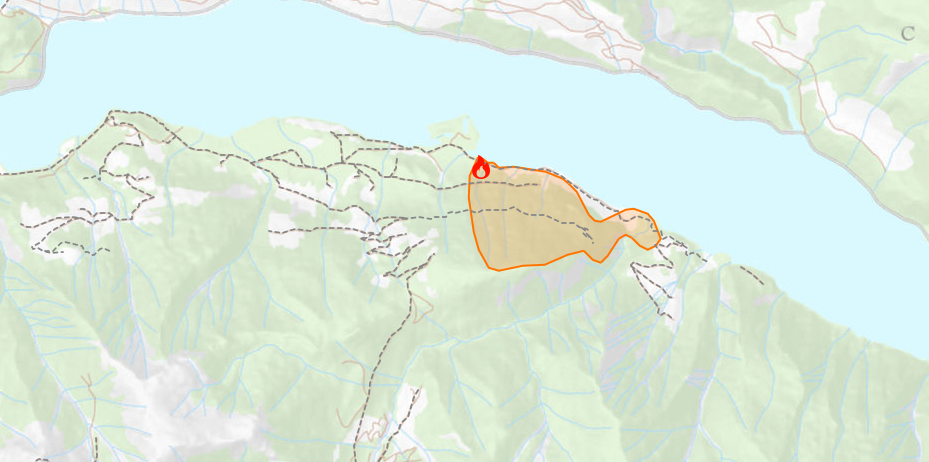
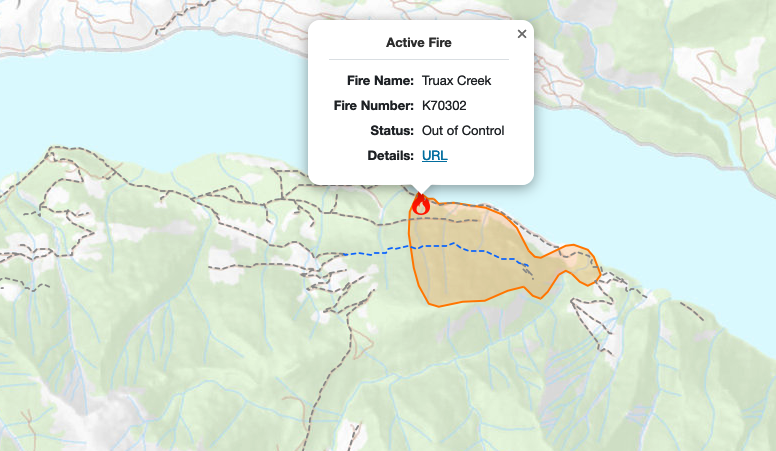
This layer will display active fires around British Columbia. The information is sourced from: Wildfire Situation BC and is updated every 15 minutes. This fire information can help you determine if a road or area is close to an active fire. Please consult the Wildfire Situation BC site for the latest information and safety related measures. Active fire information may be incomplete and should not be solely relied on for travel purposes.
I'm working on a suggestion/contact form. But in the meantime, you can send an email to the: info@backroadstatus.com email address
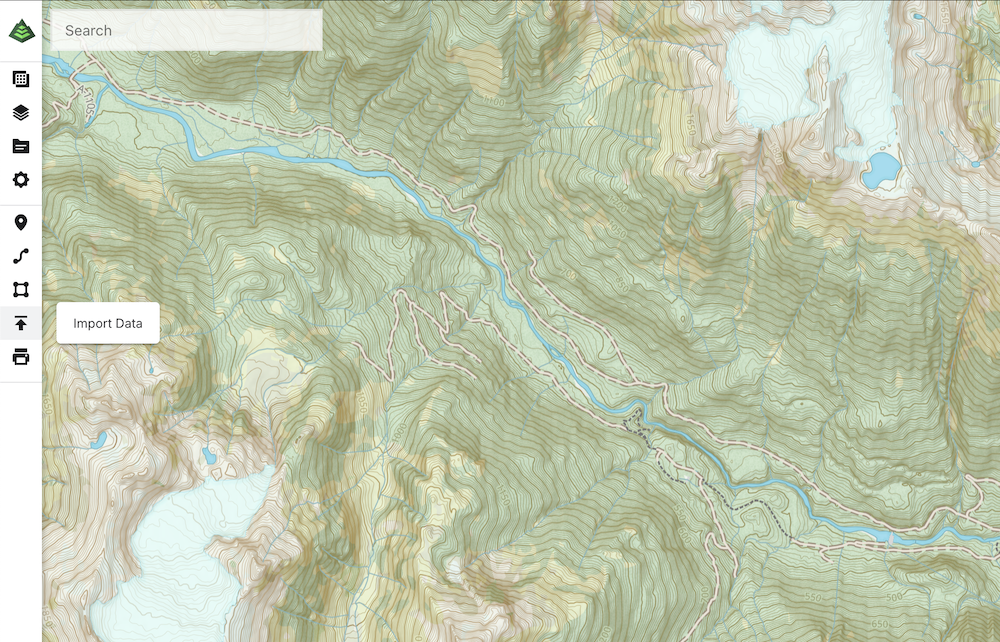
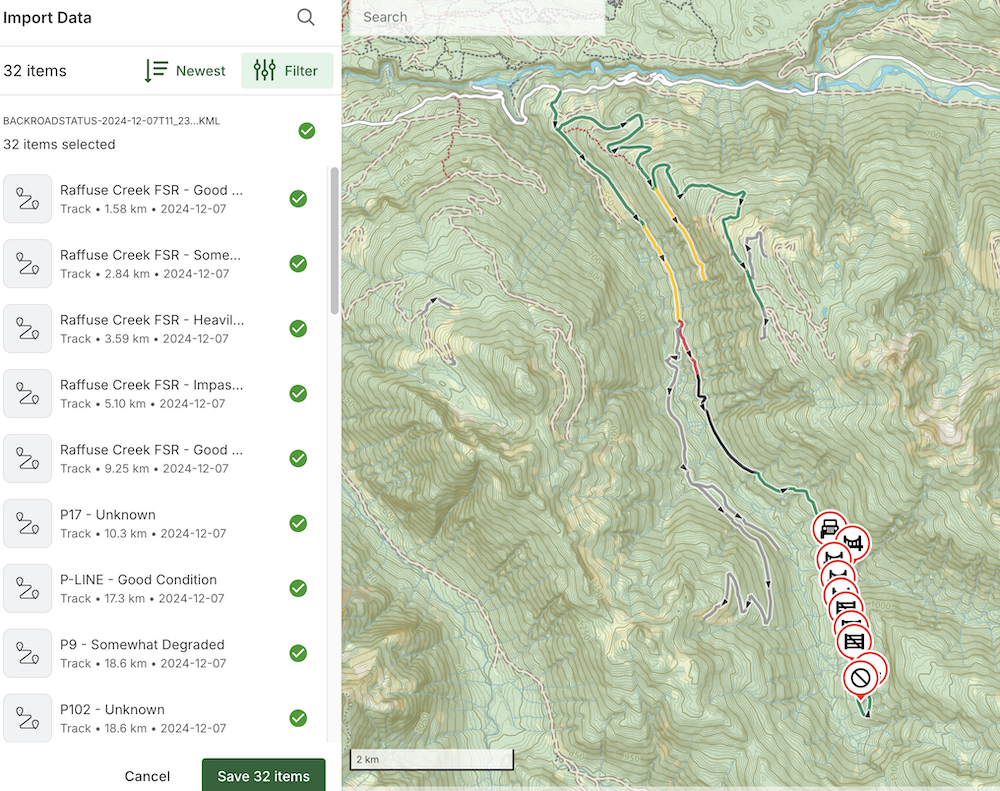
The road data is imported from the B.C. Government FTEN Road Segment dataset and augmented with additions from admins, maintainers and the community abroad! The official link is here.
For the time being you can manually request an account deletion by sending an email to: info@backroadstatus.com. You will be asked to verify proof of your account before deletion is complete.
Active contributors can view up to date satellite imagery on the map whenever they are logged in and actively exploring the map. Users are considered active contributors when they have created 5 or more road bulletins in the last 365 days. To see how to enable the up to date satellite layers view the video below:
Note that after you've created a fifth road bulletin you will need to log out and back in again to gain access to the satellite layers. Users who already have 5 bulletins only need to be logged in.